Where the Dinosaurs Are
OLD BONE ODORI:
(my dance with dinosaurs)
page 2
GLENCOE AND THE PT RENAISSANCE
As I said earlier, when
Glencoe
reissued the ITC kits I didn't buy the Tyrannosaurus or
Stegosaurus
immediately as I already had them and was reasonably satisfied
with
them despite having been repaired many times over the
years. In
1994 I saw an advertisement in
the bulletin of the Dinosaur Society
for a collector's newsletter called Prehistoric
Times. It sounded intriguing and I ordered a
subscription. The first issue I received was probably #5
and it
was so much fun that I immediately ordered all of the
back
issues. Issue #2 had a picture on the last
page of a
model that publisher Mike Fredericks put together. It
was a Glencoe
Tyrannosaurus. In putting the model
together, Mike did something that really impressed me.
Instead of
making it out of the box in the old-fashioned kangaroo stance,
he
straightened the tail, drilled out the openings in the skull
and cut
the leg joints to pose it like a poorman's Ants
Allosaurus.

LAST PAGE FROM PREHISTORIC TIMES #2 1993
What
a great idea! I ran down to the hobby shop where I
found the
Brontosaurus and to my
delight the Tyrannosarus was still on the
shelf! I
decided to make it as scientifically
accurate as possible. I used Horner's book The Ultimate T-rex as a
primary source
along with whatever else I could find to guide my
modifications.
I
used
a
lot
of
what
I
had
learned
about
assembling
a
skeleton
from
the
Allosaurus,
which
led
me
to
do
a
lot
of
major surgery on that
plastic. Locating slots and tabs pretty much went the
way of the
dinosaur as I separated and repositioned practically every
single
piece. I cut the cervical vertebrae into individual
pieces,
drilled a hole through each and strung them on a wire
support, then
added scratch-built laminae and ribs. I cut the
ribcage into
separate ribs and detailed their articulations with the
spine.
The metatarsals were altered with epoxy to emphasize
the pinched
bone in the center. The leg bones were cut apart
and
repositioned with pins for extra support as was the
tail. The
number of vertebrae in the tail was cut down as the original
museum
mount on which the model was based had way too many of
them.
After drilling out all of the openings in the skull, I made
a palate
and carefully separated the teeth with a tiny saw before
polishing them
with fine sandpaper. Having finally realized that
dinosaur
skeletons are not bone white, I painted it to look more like
a real
fossil. All in all, it took me over two months to get
it the way
I wanted. Trying to get this model done "right" has
been a
popular activity, at least among the small community of
kokkalophiles. On the Tyrannosaur
page
elsewhere in this website is the happy Christmas tale of
another ITC
rex. There is another, sadder story that I'll get to
below in my
section on Steve Harvey and Wiccart.
Incidentally, you may
notice the position of the forelimbs here is now considered
antiquated
and as of early 2014 they have been revised, a revision I
display on
page 5.

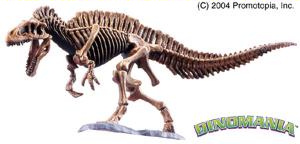
ITC/GLENCOE TYRANNOSAURUS 1/25 17" (43 cm)

ORIGINAL SKULL AND NECK

REWORKED SKULL AND NECK

ADDITIONAL RIB AND SPINE DETAIL
The Tyrannosaurus was not
enough. While I didn't modify it nearly as
much as
the
Tyrannosaurus, I decided to give my Brontosaurus a
makeover. I
altered the pose of its legs, used a Dremel to
improve the rib/spine articulations and thinned the cervical
ribs. I also painted it to look like a
fossil. A 1/35 scale explorer from a Tamiya diorama
kit joined it on the base. It turned out that the animal
called
Brontosaurus in the 1950's, when the kit was made, was
actually an
Apatosaurus and should have had a long Diplodicid type of
skull.
The kit,
reflecting its era, had a blunt faced Camarasaurus-like
skull. As
luck would
have it, the Dinosaur Studio offered a replacement resin skull
for
slightly less than the price of the entire kit. I bought
it,
drilled out the fenestrations and mounted it, giving me an
Apatosaurus. My Apatosaurus was a great example of
serendipitous
timing. At that time the Tyrannosaurus kit
was no
longer showing up in
local shops and I was now beginning to realize that
opportunities may
be temporary and subject to disappearing if not grabbed.
While
Tyrannosaurus
kits show up on Ebay from time to
time and the Glencoe Stegosaurus is still listed for sale by
Squadron,
the Brontosaurus is rarely seen and that replacement
skull is
no longer available. When I found a Glencoe
Stegosaurus at a local hobby shop, I bought it after only a
moment's
hesitation.
While I already had my brother's old Stegosaurus, I was now
certain
that, as with the other models in the series, I could
do a better job of it now. When I bought it, I planned
to make it a
more accurate reflection of current
thinking in limb and tail positions as well as plate and spike
placement. It took me over a decade to get around to
it, but I
finally took it out of the the closet and the result is
featured on
page 5 of this website. I
have other plans for the old one; I just need
time...

ITC/GLENCOE BRONTOSAURUS WITH APATOSAURUS SKULL 1/35 21" (53 cm)

The original
ITC/Glencoe Kit skull
KAIYODO-ED